Setting up the backup client
The CMon needs to be successfully installed in order for the agent to connect to it.
NovaBACKUP clients need to be configured in order for the backup client agent to connect to CMon.
You can create a custom backup client setup installer pre-configured to automatically connect to CMon.
See Customize Backup Client Setup Installer for more details.
To manually configure the backup client to connect to CMon, follow these steps:
- Install the NovaBACKUP® backup client.
See the
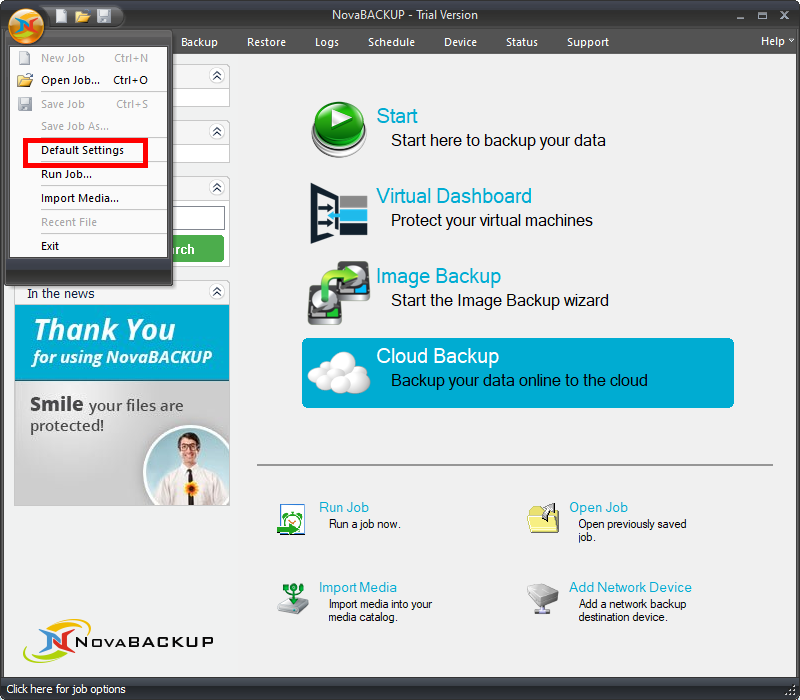
NovaBACKUP® Quick Install Guidefor more details. - Launch NovaBACKUP.
- Click the large circular button with the NovaStor logo, highlighted at the top left, and then click
Default Settings.
- Click on the
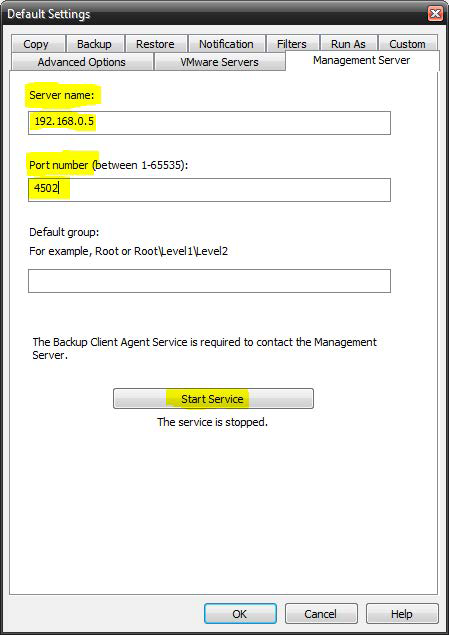
Management Servertab. Enter the server address or IP address of the machine where CMon is installed in theServer namefield. Enter the port number CMon is configured to use in thePort numberfield. These values should be the same values entered during the CMon installation. The default port number is4502. TheDefault groupoption on this screen will automatically place this agent into the group specified on the CMon. In general you do not need to enter anything in theDefault Groupoption at this point. If you do not choose a default group the agent will be placed in thePendinggroup in CMon.
- Click the
Start Servicebutton to start the service.The service is startedis displayed when the service has started successfully which is required in order to connect to CMon. Click theOKbutton to save the changes. Now you have the CMon installed, the backup client installed, and the agent connected to CMon. You should now be able to login to the CMon and see the agent. - Verify the service automatically starts with Microsoft Windows:
a. ClickStart, typeServices, and launchServices. Alternatively, launchservices.msc. b. Right-click on theBackup Client Agent Serviceand selectProperties.
This is the service which connects to CMon, and runs in the background, so the agent can be managed. c. Set theStartup typefield toAutomatic (Delayed Start). d. Click theOKbutton. e. Close theServiceswindow.